|
Some pics of my speaker cabinet project. | |
|
Thanks to a post on AX84.com, I learned that Carvin was blowing out some of their Eminence speakers. As of October 2005, the sale has been going on for several months now. They're letting them go at $19 each. Shipping was about $9US regardless of the number ordered, so I bought four.
At first I planned to build a slant 4x12, but decided on a pair of 2x12's when I thought about:
I decided to take a few photos and I still have some to add. There will probably never be enough photos here to use as a step-by-step guide, but hopefully you'll see that these things aren't that hard to put together. My woodworking skills are pretty bad, so this is by no means a definitive way to build one. It's just the way I did it.
| |
 Here's the first cabinet I built, obscured by my disinterested son. From the top is my Roland SDE1000, an EL34-modded Bassman, and the 2x12. At some point I'll cover it in Tolex. Probably when I have to use it in public. | |
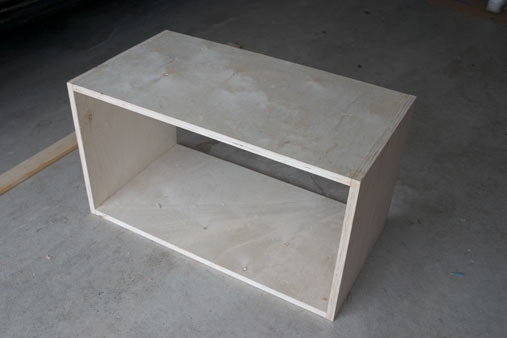 Here's the basic box for the identical second cabinet. I used a reasonably void-free 8'x4' sheet of 3/4" plywood from Home Depot. One sheet is enough to build one cabinet with material left over. It was $30 and they'll cut it down to managable sizes for free... if you can find someone to help you. I've since read that 1/2" can be beneficial for everything but the soundboard, but I was committed at this point. The box is 31" x 16" x 16.5" deep. Glued with yellow carpenters glue and screwed together. It helped to clamp everything while putting the screws in. Clamps can really add up if you don't already own some. I have a 36" and a couple of much smaller ones (see below). All totalled, about $40.
| |
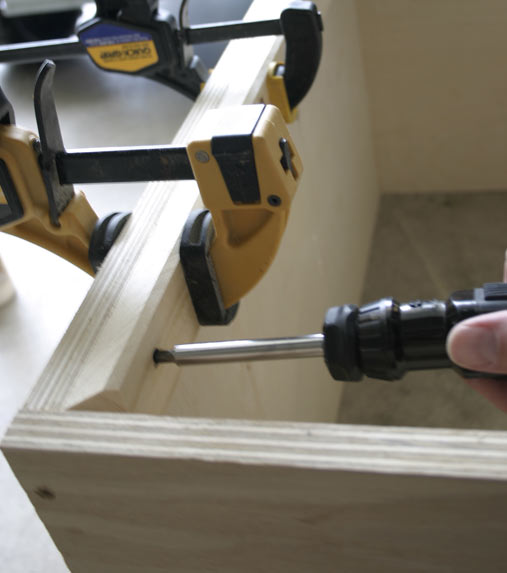 Here I'm adding a front trim piece made from 1x1.5" pine. Once again, the clamps hold everything in place. I put these in to give the cabinet a more substantial look. I've always liked the looks of Orange cabs, so I ran the trim piece through the table saw with the blade set at 45 degrees. I think you'll agree, it now it looks exactly like a vintage Orange... Oh yeah, I used a combination of electric and manual screwdrivers. The trim is soft pine. I was concerned I'd split it with a power tool, so I used the manual one. | |
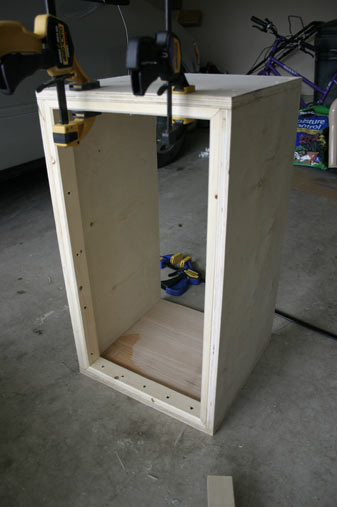 After adding the last trim piece. The wet spot was where I sponged up some excess glue. I buy my screws in large boxes and I'm not afraid to use them. | |
|
That's it for the moment. I'm still working on this thing, so I expect to have more photos before the end of October.
Last update was October 4th, 2005. |